Seamless Workflow: How to Integrate LinkedIn Sales Navigator and CRM
Let’s Begin

Imagine you're a sales superhero, and LinkedIn Sales Navigator is your trusty sidekick. It helps you find and connect with potential customers, making your job easier. Then you can access your CRM system and reinstate this data to streamline your sales process.
But wait, isn’t that like multiplying your tasks instead of multitasking?!
Then how to effectively manage leads and effortlessly transfer all this valuable information into your CRM system in no time?
Integrating LinkedIn Sales Navigator and your CRM software is the answer you've been searching for. It is the missing piece that bridges the gap between prospecting on LinkedIn and managing your sales pipeline in your CRM. Using CRM and Sales Navigator separately creates unnecessary duplication of tasks. It's like adding extra steps to your workflow when there's a simpler solution available that allows you to multitask efficiently. When you bring LinkedIn Sales Navigator and CRM together, it's like having a super team-up that saves you time and makes you even more effective.
- You streamline your workflow,
- Eliminate redundancy, and
- Maximize your productivity.
In this article, we'll show you how to integrate these two tools and work seamlessly. You can be a sales superhero with a workflow that's smooth as silk.
If you are here, then probably you are well aware of these tools. However, if it is otherwise, take a quick tour and understand the basics of a sales navigator and a CRM system.
LinkedIn Sales Navigator – An Overview
LinkedIn Sales Navigator is a powerful tool designed specifically for sales professionals. It provides a range of features and functionality to enhance prospecting and relationship-building efforts.
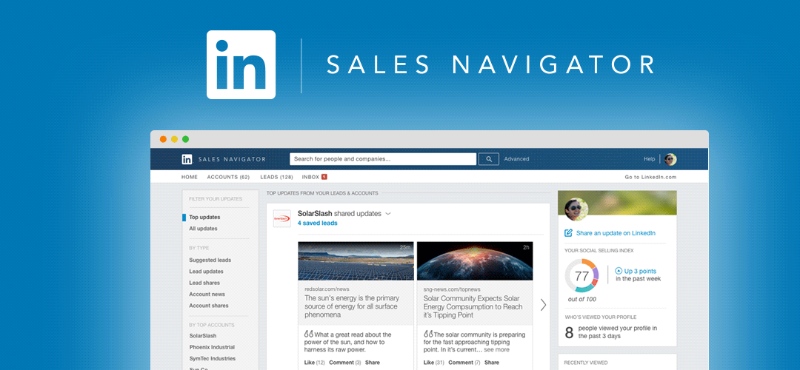
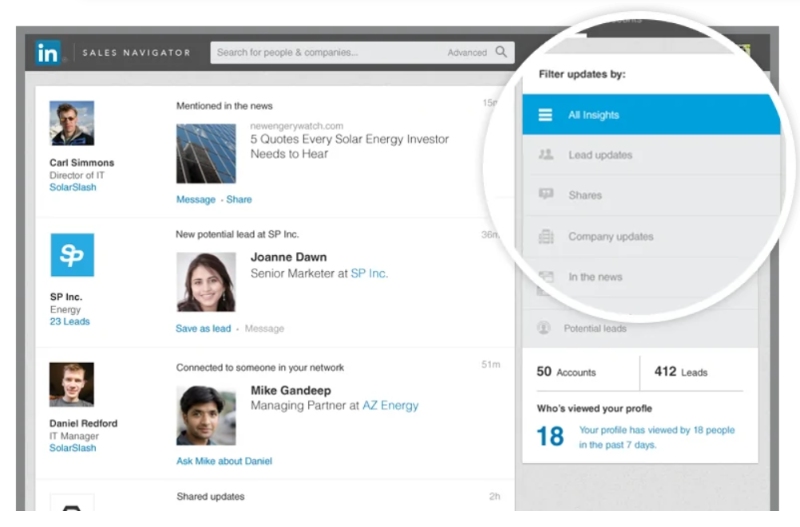
With Sales Navigator, users can access advanced search filters to find and target the right prospects, receive real-time updates on leads and accounts, engage with prospects through InMail messages, and gain valuable insights into buyer preferences and activities. It also offers integration with other sales tools and CRM systems, allowing for seamless data flow and enhanced sales efficiency.
CRM systems and their significance in sales
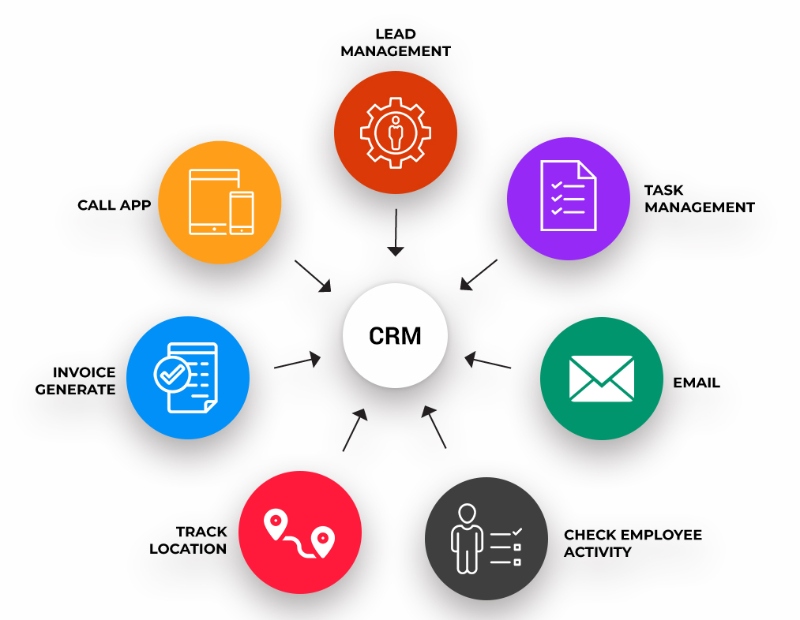
Customer Relationship Management (CRM) systems are essential tools for managing customer interactions, sales processes, and data. They enable sales teams to centralize and organize customer information, track interactions, and touchpoints, manage leads and opportunities, and forecast sales performance.
CRM systems provide a comprehensive view of customer interactions, helping sales professionals effectively manage their pipeline, build stronger relationships, and make data-driven decisions. By enhancing the management of customer relationships and sales processes, CRM systems can significantly boost sales potential. They play a crucial role in streamlining sales workflows, optimizing sales processes, and driving business growth.
How to Sync CRM with Sales Navigator
The LinkedIn Sales Navigator- CRM integration happens in three stages. Let us discuss them one by one.
Stage #1: Preparing Sales Navigator and CRM accounts
Preparing your accounts for LinkedIn Sales Navigator CRM integration involves a few key steps to ensure a smooth and successful integration. Here's a step-by-step guide to help you get started:
1. Evaluate your CRM system:
Review your CRM system and ensure it is compatible with Sales Navigator integration. Check for any specific requirements or prerequisites mentioned by both Sales Navigator and your CRM provider.
2. Familiarize yourself with Sales Navigator features:
Take the time to understand the features and functionality of Sales Navigator that you want to sync with your CRM. Identify the specific data points, contacts, or activities that you want to synchronize between the two platforms.
3. Assess data cleanliness:
Cleanse and organize your data in both Sales Navigator and CRM. Remove any duplicates, update outdated information, and ensure data consistency across both platforms. This step is crucial to prevent any data conflicts or inaccuracies during the integration process.
4. Review integration documentation:
Consult the integration documentation provided by Sales Navigator and your CRM provider. This documentation will outline the specific steps and requirements for integrating the two platforms. Follow the instructions carefully to ensure a successful integration.
5. Gather necessary credentials and access:
Collect any API keys, authorization tokens, or other credentials required for the integration process. Make sure you have the necessary access rights and permissions in both Sales Navigator and your CRM to establish the integration.
6. Backup your data:
Before initiating the integration, consider backing up your data in both Sales Navigator and CRM. This serves as a precautionary measure in case any data is lost or corrupted during the integration process.
Stage #2: Connecting the Two Platforms
Once you have prepared your Sales Navigator and CRM accounts for integration, you can proceed with connecting the two platforms. Here is a step-by-step guide to help you through the process:
1. Identify integration options:
Determine the available integration options for your specific CRM system and Sales Navigator. Check if there are native integration capabilities or if you need to utilize third-party integration tools.
2. Install necessary connectors or plugins:
If your CRM offers native integration capabilities, install the necessary connectors or plugins provided by Sales Navigator. These connectors facilitate communication and data synchronization between the two platforms.
3. Configure integration settings:
Access the integration settings within your CRM system and Sales Navigator. Configure the settings to define the data points, contacts, or activities you want to synchronize. Specify the frequency of synchronization and any other preferences as per your business needs.
4. Establish authentication and authorization:
Authenticate your CRM system with Sales Navigator by providing the necessary credentials or authorization tokens. This authentication ensures a secure connection between the two platforms and allows data transfer.
5. Map data fields:
Map the relevant data fields in your CRM system with the corresponding fields in Sales Navigator and ensure data validation. This mapping ensures that data is accurately synchronized between the two platforms. For example, map contact names, email addresses, job titles, and other relevant information.
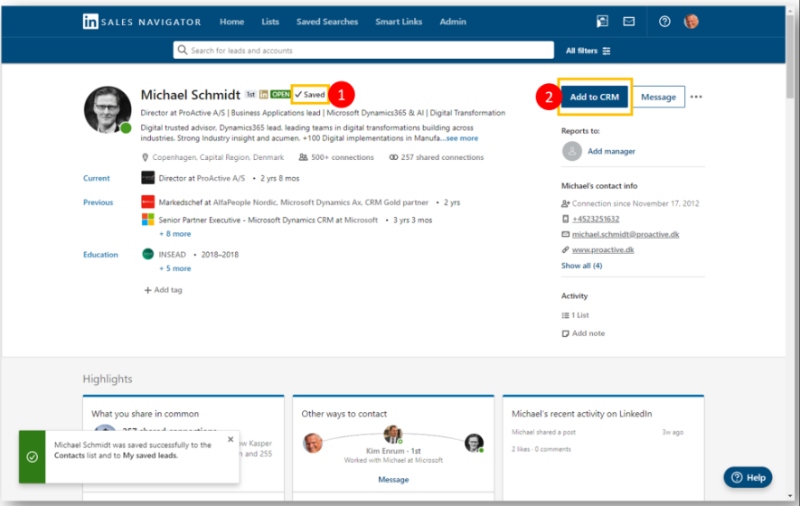
6. Test the integration:
Before fully implementing the integration, perform thorough testing to ensure that data synchronization is functioning as expected. Test the flow of data between your Sales Navigator account and CRM, by verifying that contacts, leads, and activities are being synced accurately.
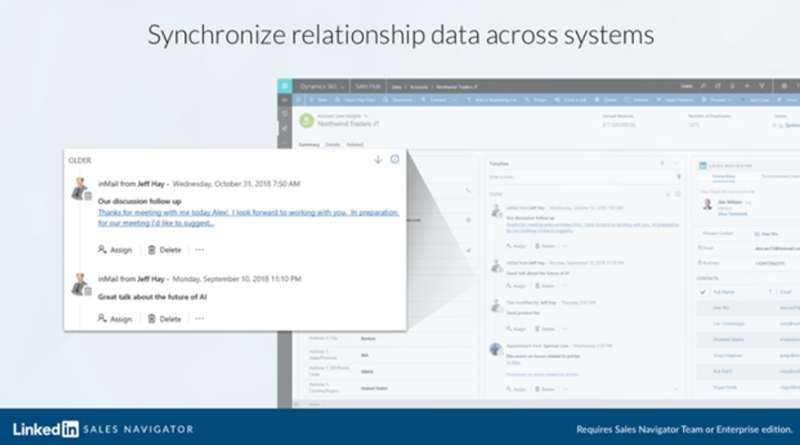
7. Monitor and troubleshoot:
Once the integration is live, monitor the data synchronization regularly. Keep an eye on any potential issues or discrepancies and address them promptly. Stay in touch with support teams from both Sales Navigator and your CRM provider to troubleshoot any integration-related challenges.
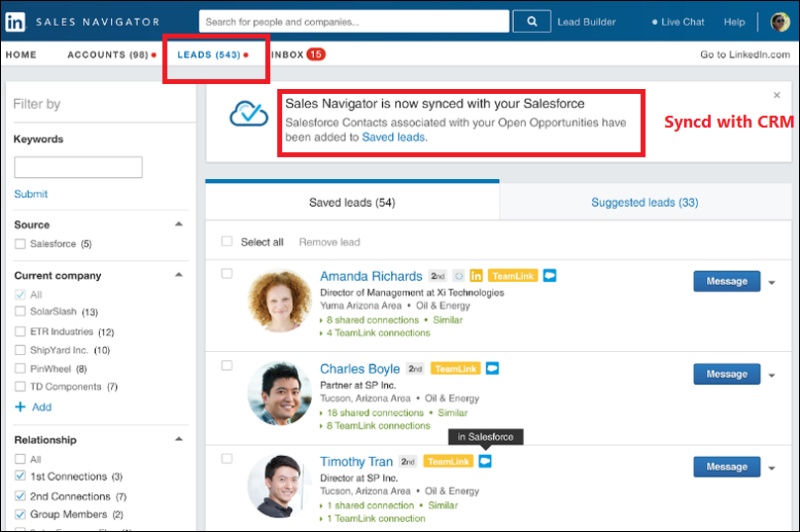
By following this step-by-step guide, you can successfully connect Sales Navigator and your CRM system. The integration allows for seamless data synchronization, enabling you to leverage the power of Sales Navigator's features within your CRM environment and enhance your sales effectiveness.
Stage #3: Configure Settings and Permissions
Configuring settings and permissions is a crucial step in achieving seamless data synchronization between Sales Navigator and your CRM system. By properly configuring these settings, you can ensure that data is accurately exchanged and synchronized between the two platforms. Here's an explanation of how to configure settings and permissions for seamless data synchronization:
1. Access integration settings:
Within your CRM system and Sales Navigator, locate the integration settings or configuration options. These settings will allow you to define the rules and preferences for data synchronization.
2. Select synchronization options:
Determine which data points you want to synchronize between Sales Navigator and your CRM system. This may include contacts, leads, accounts, activities, or other relevant data. Choose the synchronization options that align with your sales processes and objectives.
3. Define synchronization frequency:
Specify how often you want data to be synchronized between the two platforms. You can choose real-time synchronization or set a specific interval for data updates. Consider your business needs and the frequency of data changes when determining the synchronization frequency.
4. Set up field mapping:
Configure the mapping of data fields between Sales Navigator and your CRM system. This ensures that data is correctly matched and synchronized. Map relevant fields such as contact names, email addresses, job titles, company information, and any other data points you want to synchronize.
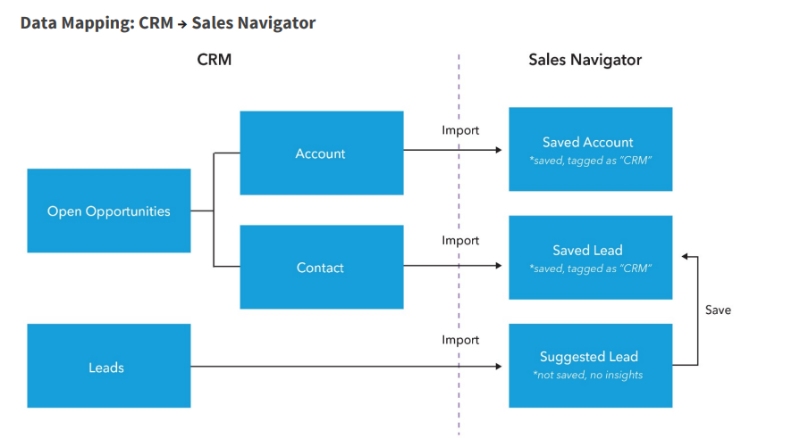
5. Establish permission settings:
Determine the access and permission levels for users who will be utilizing the integration. Define who can view, edit, and manage the synchronized data. Grant appropriate permissions to ensure data security and compliance.
6. Test synchronization:
After configuring the settings and permissions, perform a thorough test of the data synchronization process. Verify that the synchronized data appears correctly in both Sales Navigator and your CRM system. Test different scenarios, such as creating new contacts or updating existing ones, to ensure seamless data transfer.
7. Monitor and refine:
Once the configuration is complete and the synchronization is live, regularly monitor the data flow between the two platforms. Keep an eye on any discrepancies or issues and make necessary adjustments to the settings. Continuously refine the configuration to optimize data synchronization and ensure a seamless experience.
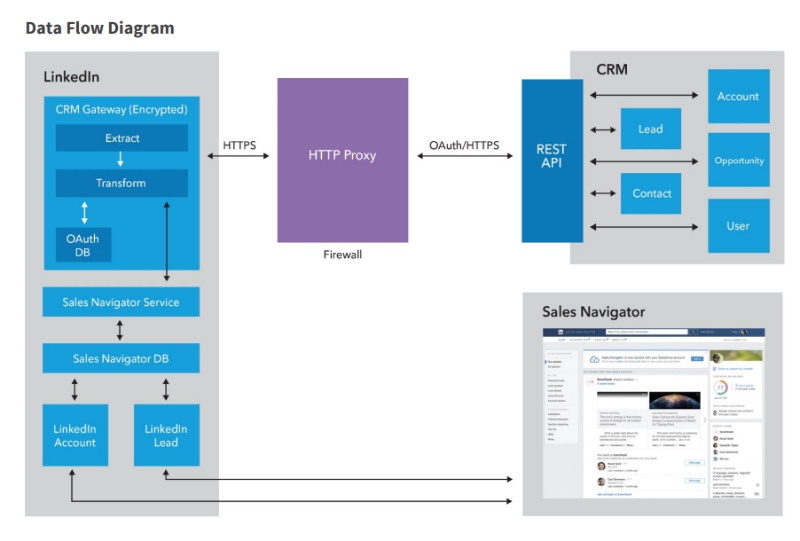
By carefully configuring the settings and permissions for data synchronization, you can achieve seamless integration between Sales Navigator and your CRM system. This allows for efficient data exchange, improves sales productivity, and enhances your overall sales process.
Conclusion
In conclusion, integrating Sales Navigator and CRM offers numerous benefits and advantages for sales teams. It streamlines workflows, improves efficiency, and enhances sales performance. By seamlessly synchronizing data between these two powerful tools, sales professionals can gain deeper insights, nurture relationships, and close deals more effectively. So, don't miss out on this opportunity to maximize your sales potential.
Remember, as Will Rogers once said, "Even if you're on the right track, you'll get run over if you just sit there."
Embrace the seamless workflow of integrating Sales Navigator and CRM to drive your sales success forward.