Everything You Should Know About the List Button Feature in Salesforce Platform
Introduction
The Salesforce platform is packed with features designed to streamline business processes and improve efficiency. One such feature is the List Button, which allows users to perform actions on multiple records simultaneously, saving time and effort. In this article, we will delve into the list button feature in Salesforce, see how to create and customize list buttons, how to export list views, and what the best practices are for using this powerful tool.
What is the List Button Feature in Salesforce?
List buttons are custom buttons that can be added to list views, related lists, or search layouts in Salesforce. These buttons enable users to select multiple records from a list and perform a specific action on all selected records at once. Some common use cases for list buttons include updating field values, sending emails, or launching a Visualforce page for the selected records.
Creating a List Button in Salesforce
To create a list button, follow these steps:
1. Navigate to the Salesforce Setup menu (the gear icon in the top right corner).
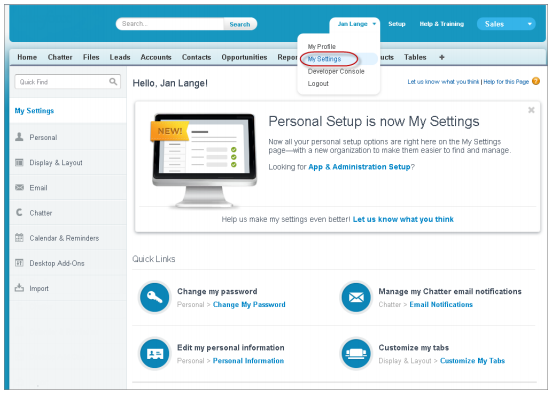
2. In the quick find search box, type "Buttons, Links, and Actions" and click on the relevant object (e.g., "Contacts Buttons, Links, and Actions").
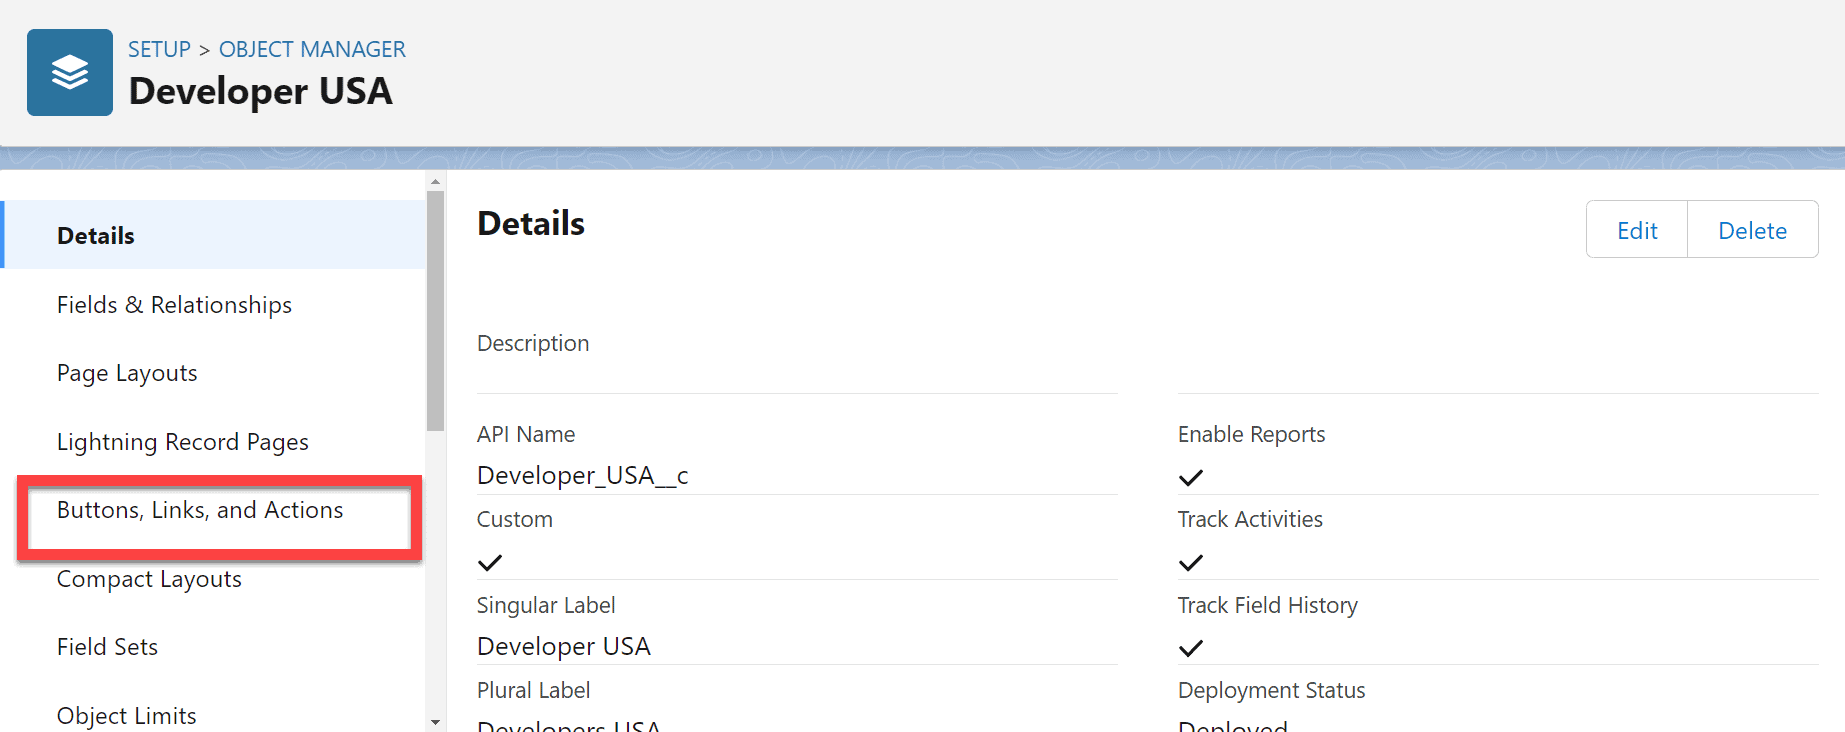
3. Click on the "New Button or Link" button.
4. In the Label field, enter a descriptive name for the button (e.g., "Update Status").
5. Select the "List Button" in the Display Type field.
6. Choose the appropriate Behavior (e.g., "Display in existing window without sidebar or header") and Content Source (e.g., "URL") for your button.
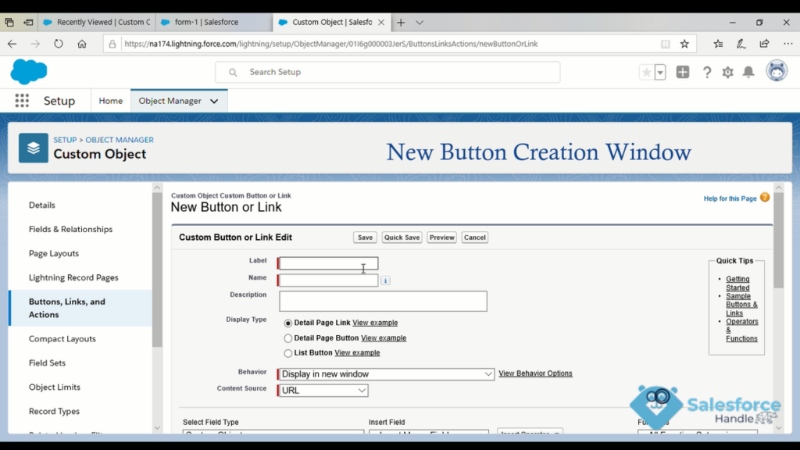
7. In the Content field, enter the URL, JavaScript code, or Visualforce page reference that defines the button's action.
8. Click "Save" to create the list button.
9. Adding the List Button to List Views, Related Lists, or Search Layouts
10. Once you have created your list button, you need to add it to the desired list views, related lists, or search layouts. Follow these steps:
11. Navigate to the Salesforce Setup menu (the gear icon in the top right corner).
12. In the quick find search box, type "Search Layouts" and click on the relevant object (e.g., "Contacts Search Layouts").
13. Click "Edit" next to the layout you want to modify (e.g., "List View").
14. In the "Select Buttons to Add" section, find your newly created list button and move it to the "Selected Buttons" section using the arrows.
15. Click "Save" to add the list button to the layout.
Also Read: Steps to Connect Your Email to Salesforce
Customizing List Buttons with JavaScript or Visualforce Pages
To create more advanced list buttons with custom functionality, you can use JavaScript or Visualforce pages as the content source:
JavaScript:
If you choose "JavaScript" as the Content Source, you can write custom JavaScript code in the Content field to define the button's action. This can include calling Salesforce APIs, updating field values, or even integrating with external systems. Customizing these buttons using JavaScript can enhance their functionality, allowing you to create a more efficient and personalized user experience.
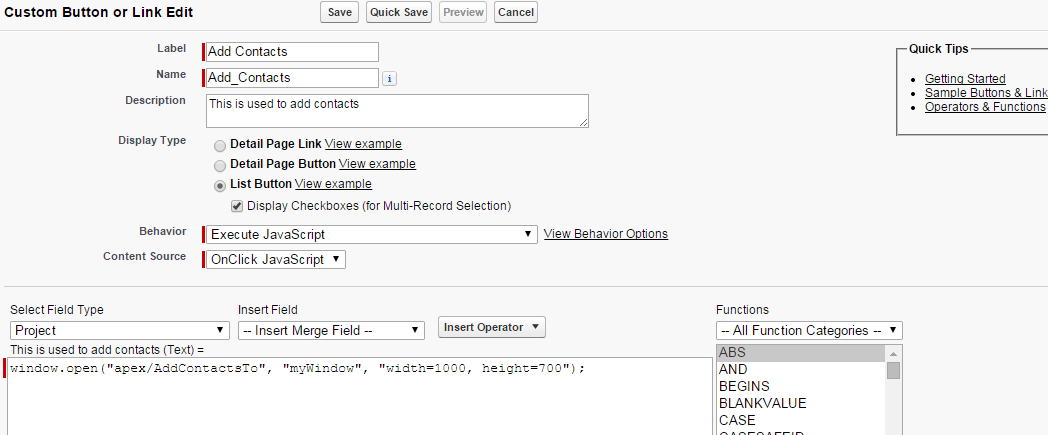
Step 1: Create a New List Button
- Click the "New Button or Link" button.
- Provide a label and a name for your new list button, and choose the "List Button" option under Display Type.
- Select "Execute JavaScript" under Behavior.
- In the "Content Source" dropdown, choose "OnClick JavaScript."
Step 2: Add Your Custom JavaScript Code
Now that you've set up your new list button, it's time to add your custom JavaScript code. In the "Content" text box, write your JavaScript code to customize the functionality of the list button. Make sure to follow best practices and avoid using any deprecated or unsupported JavaScript methods.
Step 3: Add the Custom List Button to the List View
- Navigate to the object's list view (e.g., Leads, Contacts, or Opportunities).
- Click on "Edit List View" or "Create New View" if you want to add the button to a new view.
- Scroll down to the "Select Buttons to Add" section, and add your custom list button to the "Selected Buttons" box by selecting it and clicking the right arrow.
- Save your changes.
Now, when users navigate to the list view, they will see your custom list button, which executes your JavaScript code when clicked. Customizing list buttons using JavaScript in Salesforce can enhance your users' experience and streamline processes within the platform. By following the steps outlined above, you can create personalized list buttons that execute custom JavaScript code to improve the functionality and efficiency of your Salesforce instance.
Visualforce Pages:
If you choose "Visualforce Page" as the Content Source, you can create a custom Visualforce page that defines the button's action.
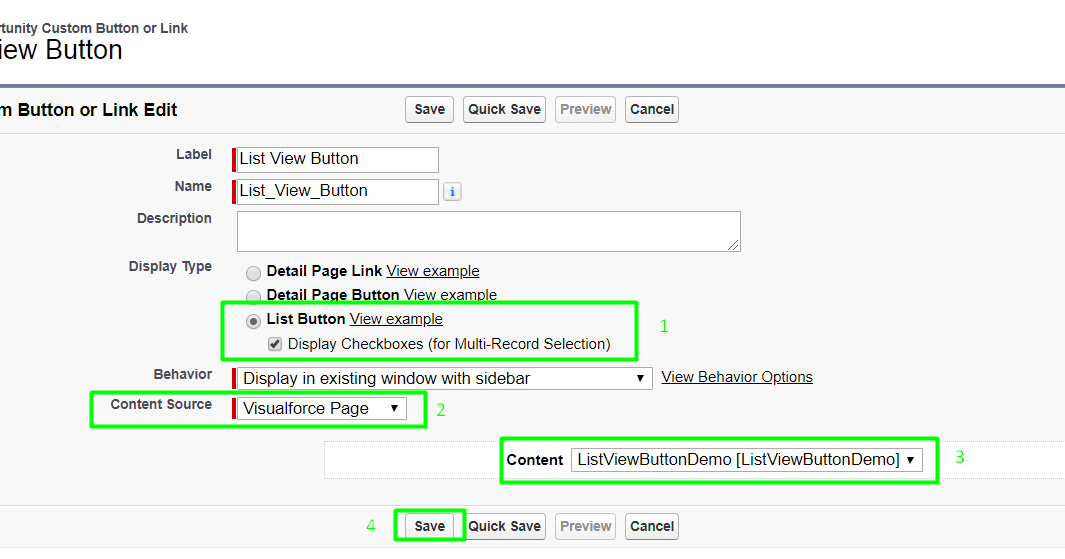
Visualforce is a powerful framework within Salesforce that enables developers to create custom user interfaces and extend the platform's functionality. One common use case for Visualforce is customizing list buttons to enhance user experience and streamline processes.
Here's a short guide on how to use Visualforce pages to customize list buttons in Salesforce:
- Create a new Visualforce page: In Salesforce Setup, navigate to 'Visualforce Pages' under 'Develop.' Click 'New Visualforce Page' and give it a meaningful name. In the markup area, add the necessary Visualforce tags and Apex code to define the custom functionality you want for the list button.
- Design the user interface: Use Visualforce tags and HTML to create the user interface for your custom list button. You can add tables, forms, or other elements to display or interact with data.
- Implement the custom logic: Add Apex code to your Visualforce page's controller class to implement the custom logic associated with the list button. This may include querying data, performing calculations, or updating records based on user input.
- Test the Visualforce page: Before deploying your custom list button, ensure that it functions as expected and adheres to Salesforce best practices. Test the Visualforce page in various scenarios to verify its behavior and performance.
- Replace the standard list button: To replace the standard list button with your custom Visualforce page, navigate to the object's search layout settings in Salesforce Setup. Locate the list button you want to replace and edit its properties. In the 'Override with Visualforce' field, select the Visualforce page you created earlier.
- Save and deploy: Save your changes and deploy your custom list button to the appropriate profiles or permission sets. Users with the necessary permissions will now see the custom list button when they access the object's list view.
By leveraging the power of Visualforce pages, you can create customized list buttons in Salesforce that enhance user experience and streamline processes, providing a more tailored solution for your business needs.
Watch the video to learn more
Best Practices for Using List Buttons in Salesforce
To make the most of the list button feature, follow these best practices:
Plan Your Use Case: Before creating a list button, identify the specific use case and desired outcome. This will help you design the button's functionality more effectively and ensure it meets your business needs.
Test Thoroughly: Test your list button thoroughly to ensure it works as intended and does not cause any unexpected issues. Be especially cautious when using JavaScript or Visualforce pages, as custom code can introduce errors or performance problems if not properly tested.
Keep It User-Friendly: Make sure your list button is user-friendly and easy to understand. Use clear and descriptive labels, and consider adding help text or tooltips to provide additional guidance.
Secure Your Buttons: Ensure that only users with the appropriate permissions can access and use your list buttons. You can control access to list buttons through profiles, permission sets, and sharing settings.
Keep Performance in Mind: When creating list buttons, consider the potential impact on system performance. Avoid using complex JavaScript or Visualforce code that may slow down the system, especially when dealing with large numbers of records.
Stay Up-to-Date with Salesforce Updates: Salesforce regularly releases updates and new features. Stay informed about these updates, as they may impact your list buttons or introduce new functionality that can enhance your use of list buttons.
Use List Buttons for Bulk Actions: Remember that the primary purpose of list buttons is to perform actions on multiple records at once. Be cautious about creating list buttons that only work with a single record, as this can lead to confusion for users and may not provide the intended benefits.
Train Your Users: Make sure your team members understand how to use list buttons effectively. Provide training materials, demonstrations, or hands-on workshops to ensure users are comfortable with the feature and can use it to its full potential.
Export Salesforce List Views
While Salesforce doesn't offer a one-click export to Excel option, it is still possible to do so.
- Open the list view that needs to be exported.
- On the top-right corner, click on the Printer icon or click on "Printable View."
- Select the rows and columns needed, and copy and paste them into Excel. The data will be formatted automatically.
- Save the report in your desired format.
Once saved offline, the list can be accessed locally without signing into your Salesforce account.
Conclusion
The list button feature in Salesforce is a powerful tool for streamlining business processes and improving efficiency. By understanding how to create and customize list buttons and following best practices for using this feature, you can save time, reduce manual work, and enhance the user experience for your team members. As you continue to use the Salesforce platform, be sure to leverage list buttons and other features to maximize the potential of your CRM system. In case you run into any problems, please visit the official help page to find frequently asked questions related to your query or to get in touch with customer care.