Salesforce Email Integration: How to Connect Your Email to Salesforce
Introduction
Salesforce is a powerful customer relationship management (CRM) platform that can significantly improve your business's sales and customer service processes. One of the key features of Salesforce is its ability to integrate with your email, allowing you to manage communications seamlessly within the platform. Gmail integrations or using Salesforce for Outlook are common ways to use an email application with Salesforce, but you have the flexibility to choose based on the use case. With a vast array of features and tools, getting started with Salesforce can seem intimidating. In this article, we will walk you through the steps to connect your email with Salesforce and explore its essential features to maximize productivity. By the end, you should have a better understanding of how to get started with Salesforce and make the most of its capabilities.
Watch how: Integrating Gmail With Salesforce
Why Integrate Email to Salesforce
Salesforce integrations allow you to import email interactions and calendar items directly into Salesforce. Just as data can be imported to Salesforce, the email account also has access to Salesforce data like customer data.
The integration and sync are two-way, ensuring maximum functionality. By syncing contacts, you can send emails to Salesforce contacts directly by syncing Salesforce with Gmail and Outlook. Logging emails and events is also extremely simple after relevant Salesforce integrations since Salesforce is capable of working with Email and Calendar tools.
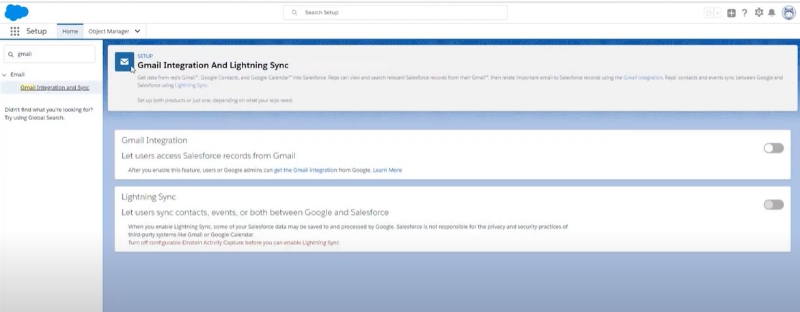
Integrating Email with Salesforce CRM
To integrate Salesforce and your email, you must first choose the right email integration solution. Salesforce offers two main options: Salesforce Inbox and Email Connect. There's also Lightning Sync to achieve similar results. As of 2024, Salesforce migrated a lot of functionality to Salesforce Lightning and has retired Salesforce Classic. Salesforce Inbox is a premium feature that provides advanced email tracking, scheduling, and analytics, while Email Connect is a more basic integration option that focuses on syncing your email with Salesforce. In this guide, we will focus on connecting your email using Salesforce Email Connect.
Step 1: Sign Up for Salesforce
Before you can connect your email to Salesforce, you need to sign up for an account. Visit the Salesforce website and choose the plan that suits your business needs. For beginners, the Essentials plan is a good starting point, offering a comprehensive set of features at an affordable price.

Step 2: Set Up Your Salesforce Environment
- Once you have signed up, you'll be prompted to create Salesforce environments, known as an "org" (short for "organization"). An environment is a space where you'll manage all your business data and processes.
- Choose a suitable environment name and provide your company details.
- Select the Salesforce apps you need (e.g., Sales, Service, or Marketing).
- Add users to your org and assign them roles with specific permissions.
Step 3: Connect Your Email to Salesforce
Connecting your email to Salesforce enables seamless communication with your contacts and allows you to track your email interactions directly within the platform. Using Salesforce and Outlook or Gmail together is convenient and efficient. Follow these steps to connect your email:

Follow these steps to set up and configure Salesforce Email Connect:
- Log in to your Salesforce account and navigate to the Setup area by clicking on the gear icon in the upper-right corner.
- In the Quick Find box, type "Email" and select "Email Administration."
- Click "Email Connect" and then "Add Email Account."
- Choose your email provider from the list and enter your email address and password. If your email provider is not listed, you may need to use the "Other" option and enter your email server settings manually.
- Click "Save" to complete the setup process. Salesforce will now sync your email with your account.
Step 4: Connecting Your Inbox to Salesforce
- Now that your email is connected to Salesforce, it's time to configure your inbox settings to ensure seamless communication between the two platforms.

- Go to the "Email Connect" settings page and click "Edit" next to your email account.
- Customize your sync settings according to your preferences, such as selecting the folders you want to sync, enabling automatic syncing, and choosing a sync interval.
- Click "Save" to apply your changes.
Step 5: Explore Salesforce Features
Now that your email is connected to Salesforce, it's time to familiarize yourself with some of its key features. Here are five features you should explore to get started:
Keep your email folders organized: Organize your email folders by creating separate folders for leads, contacts, and opportunities within your email client. This will help Salesforce accurately sync and categorize your emails.

Leads and Contacts: Manage your business contacts, including leads (potential customers) and existing customers. You can create, view, and update contact information, log activities, and track communication history.

Opportunities: Track your sales deals, including the deal's stage, value, and probability of closing. Opportunities help you forecast revenue, manage your sales pipeline, and identify areas for improvement.

Reports and Dashboards: Gain insights into your business performance with customizable reports and dashboards. Create reports using various data sources, filter criteria, and display formats. Dashboards provide a visual representation of your key performance indicators (KPIs) to help you make data-driven decisions.

Email Templates: Streamline your email communication with pre-built or custom email templates. Personalize your emails with merge fields to automatically insert contact-specific information, such as names, addresses, or recent purchases. Create and use Salesforce email templates to maintain consistent messaging and branding in your communications. This will also save time and ensure that your emails follow best practices.

Automation and Workflows: Automate repetitive tasks and streamline your business processes with workflows, process builders, and approval processes. Define criteria-based rules to trigger specific actions, such as sending email notifications, updating records, or creating tasks.

Track email analytics:

Monitor your email performance within Salesforce, such as open rates, click-through rates, and response times. Use this data to optimize your email campaigns and improve your overall communication strategy.

Step 6: Customize Salesforce to Fit Your Business Needs
One of the key strengths of Salesforce is its flexibility and customizability. To tailor the platform to your specific requirements, consider the following:
Custom Fields and Objects:
Create custom fields to store unique information about your contacts, opportunities, or other business data. You can also create custom objects to store and manage data that doesn't fit into the standard Salesforce objects.

Page Layouts and Record Types:
Modify page layouts to display relevant fields and sections based on user roles or record types. Record types allow you to create different layouts and business processes for distinct categories within a single object (e.g., separate opportunity record types for different products or services).

AppExchange:
Enhance your Salesforce org with third-party apps and integrations available on the Salesforce AppExchange. Browse through thousands of pre-built solutions that can help you address specific business needs, such as project management, invoicing, or data analytics.

Salesforce Mobile App:
Access Salesforce on the go with the Salesforce mobile app. Customize the app's layout and functionality to suit your team's needs, and ensure your sales reps can efficiently manage their leads and opportunities while out of the office.

Security and Permission Settings:
Safeguard your business data by configuring the appropriate security settings. Control user access to specific data and functionality through profiles, permission sets, and sharing rules.
Step 7: Train Your Team
To make the most of Salesforce's features and capabilities, it's essential to provide training and support for your team members. Furthermore, ensure your team stays informed about Salesforce releases and updates to leverage the latest enhancements and functionalities. Consider the following resources. Consider the following resources:
Leverage the comprehensive online Salesforce Help Center, which offers articles, video tutorials, and step-by-step guides to help users learn the platform.

Encourage your team to participate in Salesforce Trailhead, an interactive learning platform that provides free, gamified courses on various Salesforce topics, from beginner to expert levels.

Invest in Salesforce certification for your team members to validate their skills and knowledge of the platform. Salesforce offers a range of certifications for different roles, such as administrators, developers, marketers, and consultants.
In-house Training and Workshops:
Organize in-house training sessions or workshops tailored to your team's specific needs and objectives. These sessions can be led by experienced team members, external Salesforce consultants, or Salesforce trainers.
Syncing Email with Salesforce for Seamless Communication
To ensure seamless communication between your email and Salesforce, make sure to follow these steps:
- Regularly sync your email: Set up automatic syncing or manually sync your email frequently to ensure that your Salesforce records are up-to-date.
- Link emails to Salesforce records: When sending or receiving emails, link them to the appropriate Salesforce records, such as leads, contacts, or opportunities. This will help you maintain an accurate and organized communication history within Salesforce.
- Use Salesforce email notifications: Configure Salesforce to send you email notifications for important events, such as new leads, tasks, or calendar events. This will help you stay on top of your responsibilities and ensure timely follow-ups.
- Use the Salesforce Sidebar or Lightning for Outlook: If you're using Microsoft Outlook or Gmail, install the Salesforce Sidebar (for Gmail) or Lightning for Outlook (for Outlook) to easily link emails to Salesforce records directly from your email client.
- Create Email-to-Case rules: If your business relies on customer support cases, set up Email-to-Case rules in Salesforce to automatically create and link cases to the appropriate contacts or accounts based on incoming emails.
- Utilize Email Association: When sending emails from Salesforce, make sure to associate them with the relevant records, such as leads or opportunities, to maintain a complete communication history.
Learn more about Salesforce Inbox
Guide For further optimization
Configure an SMTP Mail Server: While not mandatory, using an in-house mail server is highly recommended. It eliminates the dependency on external mailing service. This way you can localize your business affairs to your organization, instead of relying on a third-party email service. It also helps to get higher email limits compared to other options.
Configure email relay: Set up an email relay to route all outgoing emails from Salesforce through your company's email server. This will help maintain consistent branding and improve email deliverability.
Customize email signature: Create a personalized email signature for your Salesforce emails, including your name, title, company logo, and contact information.
Set up email approval processes: Implement email approval processes to ensure that your team's communications follow company guidelines and best practices.
Use email aliases: Create email aliases in your email client to manage different types of Salesforce communications, such as support requests or marketing emails.

Integrate with third-party email tools: Connect Salesforce with third-party email tools, such as Mailchimp or Constant Contact, to enhance your email marketing capabilities and improve your overall communication strategy.
Utilize email tracking: Monitor email opens, clicks, and replies to gain insights into your email performance and adjust your communication strategies accordingly.
Implement email automation: Use Salesforce's built-in email automation tools, such as drip campaigns, autoresponders, and email scheduling, to save time and improve your overall email strategy.
Monitor and measure success: Regularly review your email performance within Salesforce to identify areas for improvement and optimize your communication processes.
Enhancing Salesforce Productivity with Email Integration
By integrating your email with Salesforce, you can significantly improve your team's productivity and efficiency. The seamless communication between Salesforce and your email client allows for better organization, streamlined processes, and a more comprehensive view of your customer interactions. To maximize the benefits of email integration, ensure that your team follows best practices and utilizes the available tools and features to their full potential.
Recommended: Learn How To Customise Your Salesforce List Button
Conclusion
Connecting your email to Salesforce and exploring its features can have a significant impact on your business's sales and customer service processes. Getting started with Salesforce can seem overwhelming. By following the steps and best practices outlined in this guide, you can effectively integrate your email with Salesforce and make the most of it.
Connecting your email to Salesforce is just the beginning - as you explore its features and customize it to fit your business needs, you'll unlock the full potential of this powerful CRM tool. Remember to continually optimize your email strategy, train your team, and monitor your success to ensure that your Salesforce email integration drives productivity and results for your business.